
Scallop Edge Box Card
Scallop Edge Box Card
By Julie Creek
What happens when you see this die...and you wonder.....What would happen if I could cut that edge on a box card? hmmmmm
 Then you throw in this die that you somehow fell in love with.....
 You spend a great deal of time messing around with paper. You throw away many, many scraps. you finally get it and it looks like this.....

 This card folds FLAT and fits in an envelope! WOOT! WOOT!

To make the card start with a piece of cardstock cut to 9 7/8"x5". Put the short side on the top of your score board and score at 2 3/4".
Turn the paper and put the long side against the top of the score board. Score at 1/2", 1 5/8", 5 1/4" and 6 3/8".


 Now take your scissors and cut the piece following the diagram below


 Place those pieces inside the box. I usually trim one of the pieces flaps down to 1/4". It just depends how you want things to sit when you build your design.

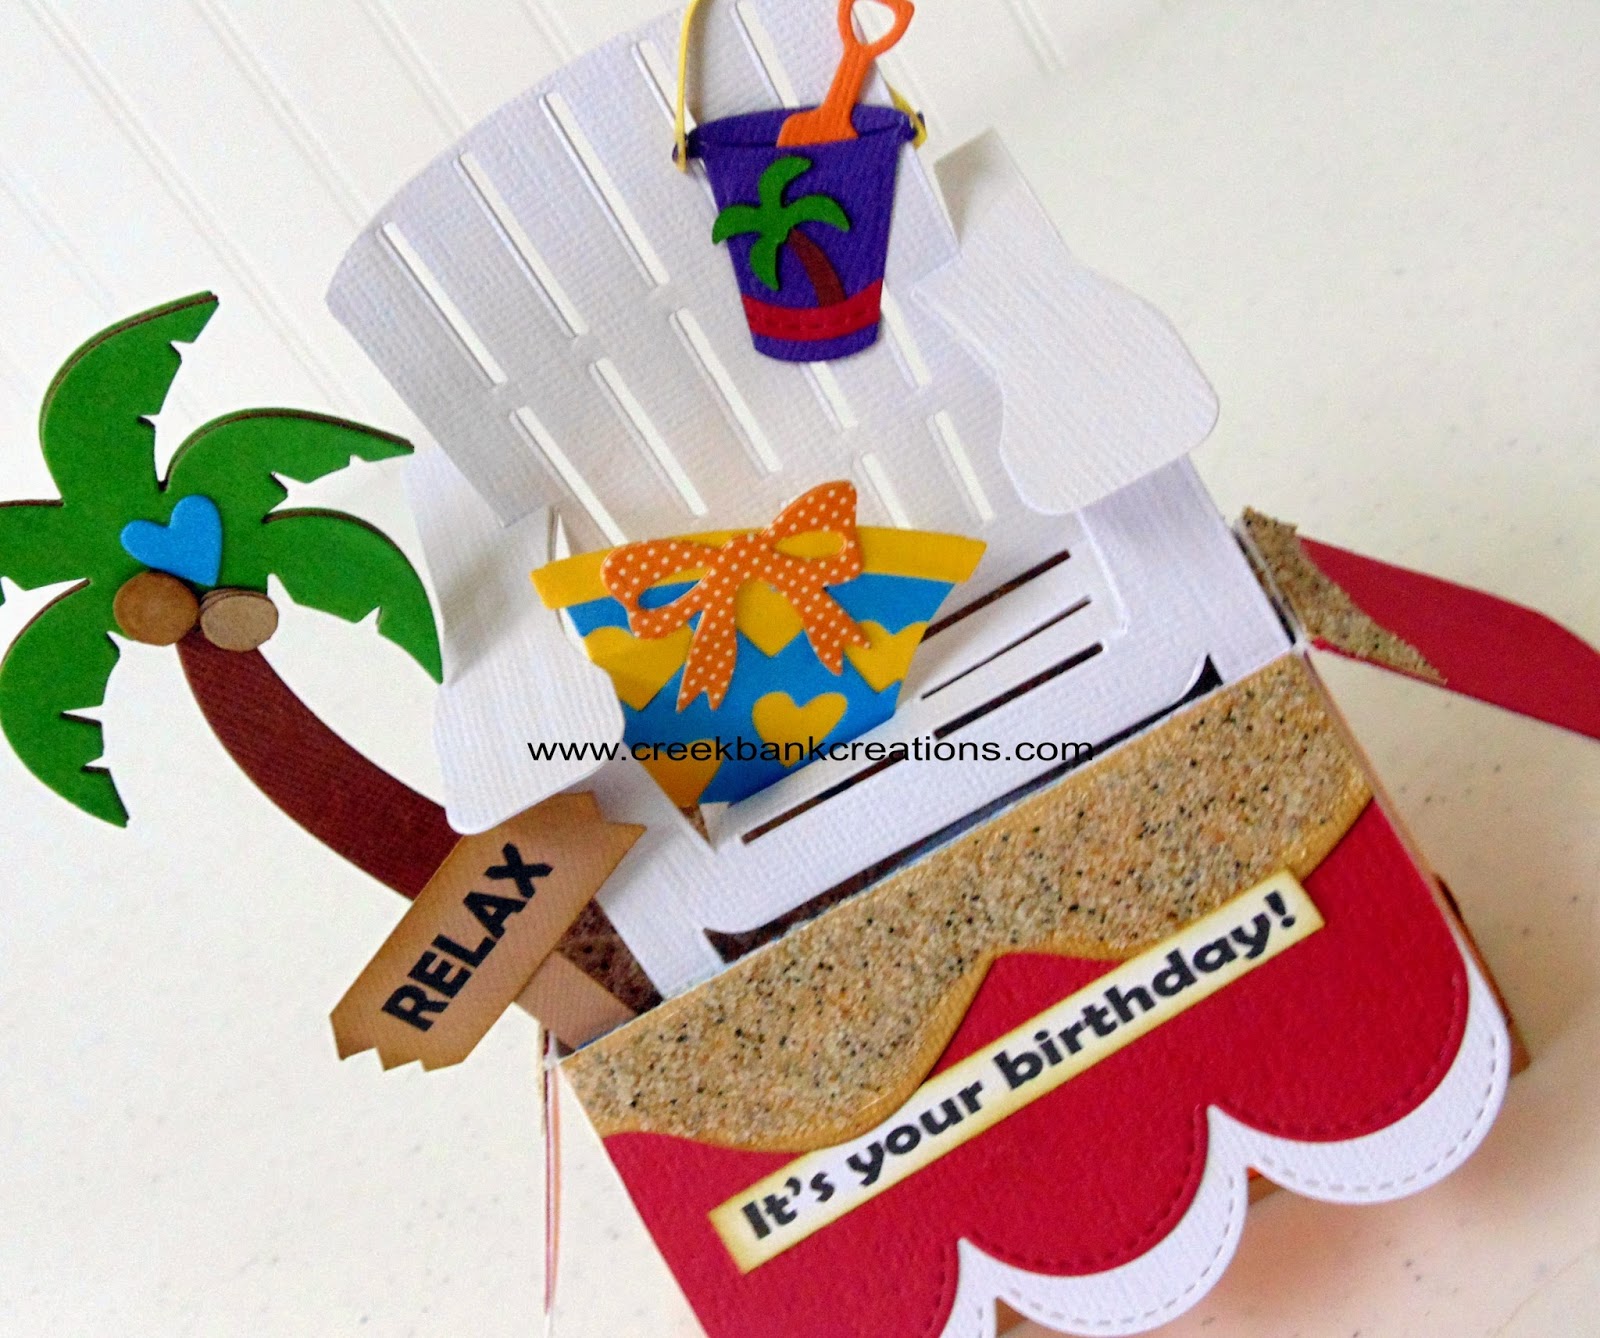
You will need to die cut the Adirondack chair from white cardstock. The photo below shows where to cut the chair shape out of the card base. Clip where the pencil lines are shown in the photo. This will give you the chair shape not attached to the card.


.JPG)


Once you have the outside decorated and you move back into the inside and decorate as desired. It is much easier to decorate the outside first so that you don't have fight the stuff you adhered to the inside!
Products used:


By Julie Creek
What happens when you see this die...and you wonder.....What would happen if I could cut that edge on a box card? hmmmmm
The sand look on this card is easy to create using the beach edges die and The Mudd Puddles product. Die cut the paper, then cover it with Mudd Puddles Adhesive. Drop sand on the adhesive just like glitter and let it dry. You will need to pre-cut your beach pieces to the size of the card, and then drop the Mudd Puddles product on them. I would not recommend trying to adhere the Mudd Puddles dry sand onto the card when it is already put together.
Turn the paper and put the long side against the top of the score board. Score at 1/2", 1 5/8", 5 1/4" and 6 3/8".
Locate the large scallop from the die set. set the die on the paper as shown below. NOTE that the first scallop on the left starts at the 1/2" score line.
Run it through your die cut machine, and cut it. Move the die over to the right, and run it through the machine again.
This is what you end up with!
The photo below shows what you end up with.
Fold on the score lines. Fold the top scalloped edge down.
Lay the piece back out and put adhesive on the far left flap.
Now you have a finished box ready to work with!
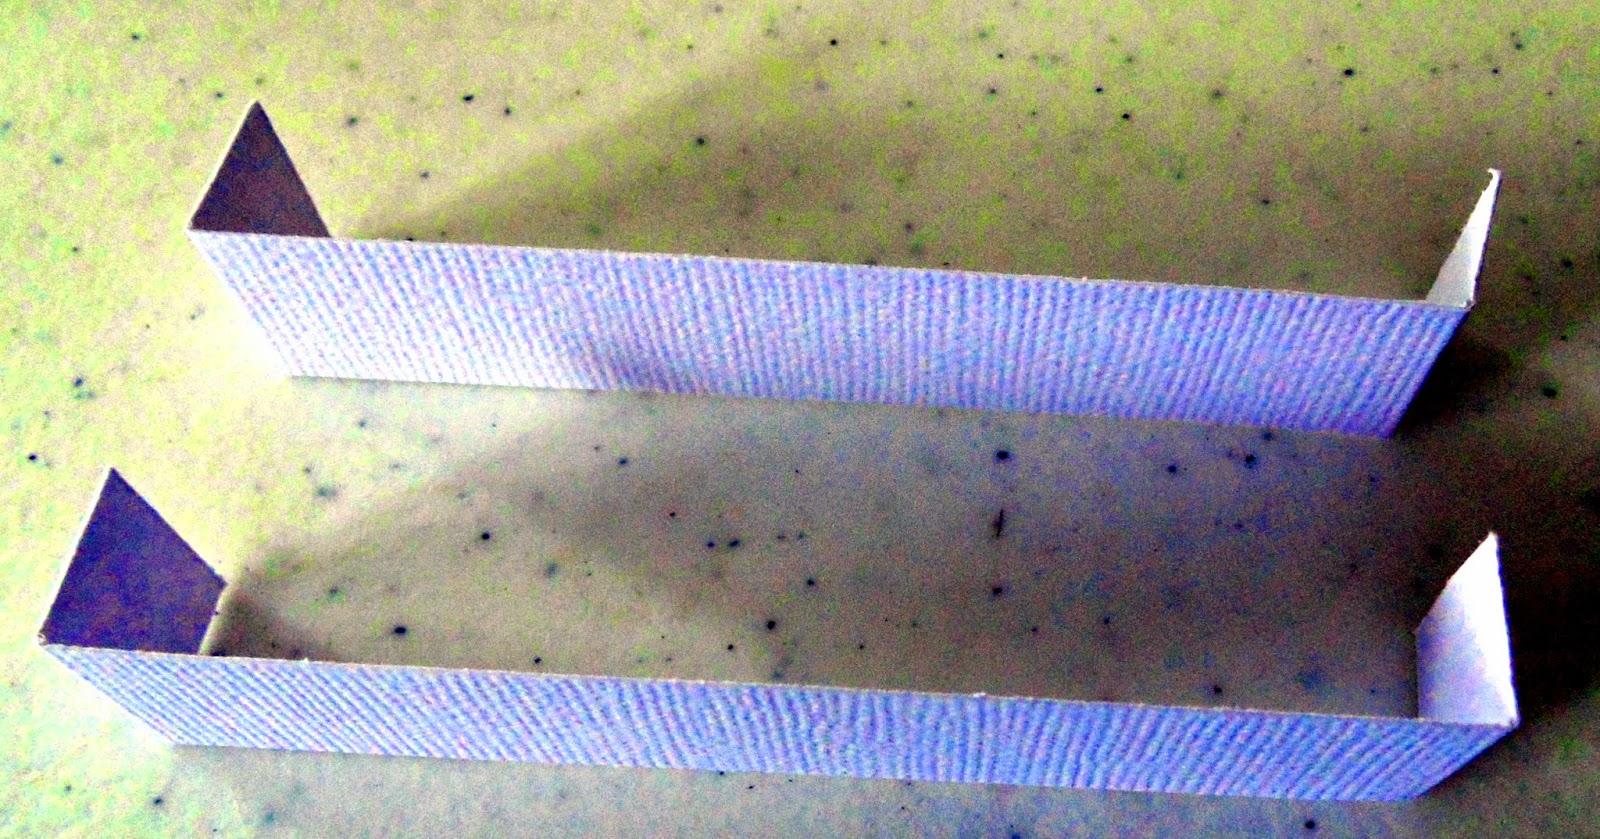
From cardstock cut two pieces 4 5/8'x 3/4". Place the paper with the long edge against the top of your score board. Score at 1/2" and 4 1/8". Fold on the score lines.
You will need to die cut the Adirondack chair from white cardstock. The photo below shows where to cut the chair shape out of the card base. Clip where the pencil lines are shown in the photo. This will give you the chair shape not attached to the card.
Now you have the chair. For the purposes of my card I cut TWO chairs and adhered them together, then folded the chair and adhered it to the card. Fold the chair along the fold lines. Adhere the chair by attaching the front to legs into the front strip IN the box. Add the chair arms to the chair.
NOW is the time to decorate the outside of your card. To make the top decorative piece cut a piece of pattern paper 2"x12". Die cut the edge just like you did earlier with the box. Adhere the piece to the box as desired. Use this same technique for the outside. The bottom box part needs decorated before you add in a bunch of extra stuff. The large rectangles measure 3 3/8"x2 1/2". The small side rectangles are 7/8"x 2 1/2".
It is a fun card to make and an awesome to GIVE!
Products used:
Orders over $50.00 ship free!
Julie Creek
Creek Bank Creations, Inc.
www.creekbankcreations.com
$100.00 crafting weekends at River Retreat House


.jpg)


No comments:
Post a Comment